This parameter specifies the width of the output image. It accepts an integer value greater than 1. If a value between 0 and 1 is specified, it acts as a percentage width. Therefore, 0.1 means 10% of the original width, 0.4 means 40% of the original width, and so on.
You can also specify the auto value for this parameter (w-auto). Doing so will instruct ImageKit.io to read the width value from the [Sec-CH-Width](https://imagekit.io/responsive-images/#sec-ch-width) Client Hint request header. Learn more about client hints [here](/image-transformation#client-hints).
You can also provide an arithmetic expression such as `iw_div_2`, `cw_mul_0.8`, or `ih` as a value for this parameter. Doing so will first calculate the value of the expression and then apply transformations using that value. Learn more about arithmetic expressions [here](/arithmetic-expressions-in-transformations).
{% callout style="info" %}\
**Note**: If you only specify the `w` parameter, then while adjusting the width, it will automatically scale the height in order to maintain the aspect ratio.\
{% /callout %}
{% linetabs %}\
{% linetab title="Original image" %}
Last updated: May 24, 2026
Width - (w)
{% /linetab %}
{% linetab title="200px wide" %}
{% /linetab %}
{% linetab title="40% width of original image" %}
{% /linetab %}
{% linetab title="W=ih_div_2" %}
{% /linetab %}
{% /linetabs %}
Height - (h)
This parameter specifies the height of the output image. It accepts an integer value greater than 1. If a value between 0 and 1 is specified, the value acts as a percentage height. Therefore, 0.1 means 10% of the original height, 0.4 means 40% of the original height, and so on.
You can also provide an arithmetic expression such as ih_div_2, ch_mul_0.5, or
ih
as a value for this parameter. Doing so will first calculate the value of the expression and then apply transformations using that value. Learn more about arithmetic expressions
.
{% callout style="info" %}
Note: If you only specify the h parameter, then while adjusting the height, it will automatically scale the width in order to maintain the aspect ratio.
{% /callout %}
{% linetab title="40% height of original image" %}
{% /linetab %}
{% linetab title="H=ih_div_2" %}
{% /linetab %}
{% /linetabs %}
Aspect ratio - (ar)
Used to specify the aspect ratio of the output image or the ratio of width to height of the output image. This parameter must be used along with either the or parameter. The format for specifying this transformation is ar-<width>-<height>.
You can also provide an arithmetic expression such as iar_div_2 or car_mul_0.75 as a value for this parameter. Doing so will first calculate the value of the expression and then apply transformations using that value. Learn more about arithmetic expressions .
{% callout style="info" %}
Note: If you specify both height(h) and width(w) in the URL along with the aspect ratio(ar), then the aspect ratio is ignored.
{% /callout %}
{% linetab title="Width 400px and aspect ratio 4:3" %}
{% /linetab %}
{% linetab title="Width 400px and aspect ratio double" %}
{% /linetab %}
{% /linetabs %}
Crop, Crop modes & Focus
If only one of the height(h) or width(w) dimensions is specified, ImageKit.io adjusts the other dimension accordingly to preserve the aspect ratio, and no cropping takes place.
But when you specify both and dimensions, you need to choose the right cropping strategy based on your website layout and desired output image.
Choosing the right cropping strategy
If you want to preserve the whole image content (no cropping) and need the exact same dimensions (height and width) in the output image as requested, choose either of the or strategy.
If you want to preserve the whole image content (no cropping), but it is okay if one or both the dimensions (height or width) in the output image are adjusted to preserve the aspect ratio. Then choose either of the or strategy. You can also use the strategy if you want to allow enlarging of the image in case the requested dimensions are more than the original image dimension.
If you need the exact same dimensions (height and width) in the output image as requested but it's okay to crop the image to preserve the aspect ratio (or extract a region from the original image). Then choose either of the or or strategy. You can combine the extract crop strategy with different focus values to get the desired result.
{% callout style="info" %}
Note: When choosing among different strategies for cropping, think in terms of your website layout and desired output image.
{% /callout %}
Pad resize crop strategy - (cm-pad_resize)
In the pad resize crop strategy, the output image's dimensions (height and width) are the same as requested, no cropping takes place, and the aspect ratio is preserved. This is accomplished by adding padding around the output image to match the exact dimension as requested.
The output image is exactly 300x200. However, to maintain the aspect ratio and prevent cropping, a solid colored padding is added around the resized image.
For the sake of clarity, we have made the padding background grey in color (#F3F3F3) using the bg in the URL.
{% /linetab %}
{% /linetabs %}
Example - All padding on one side
In the examples above, we saw that when the image is padded using the pad resize crop strategy, the padding is equal on both sides of the image. However, there might be cases where we want all the padding to be added on only one side of the image. This can be done using the focus (fo) parameter.
{% linetabs %}
{% linetab title="Padding to the right " %}
We added the fo-left transformation to our image. Now, all the padding is on the right of the image, while the image itself is on the left (determined by the value of parameter).
{% /linetab %}
{% linetab title="Padding to the bottom" %}
We added the fo-top transformation to our image. Now, all the padding is on the bottom of the image, while the image itself is on the top (determined by the value of the parameter).
{% /linetab %}
{% /linetabs %}
Forced crop strategy - (c-force)
In a forced crop strategy, the output image's dimension (height and width) is exactly the same as requested. No cropping takes place, but the aspect ratio is not preserved. It forcefully squeezes the original image to fit it completely within the output dimensions.
The entire original image is preserved in the output image as well, but the image has been squeezed to fit into the output image.
{% /linetab %}
{% /linetabs %}
Max-size cropping strategy - (c-at_max)
In the max-size crop strategy, the whole image content is preserved (no cropping), and the aspect ratio is preserved, but one of the dimensions (height or width) is adjusted.
The output image is less than or equal to the dimensions specified in the URL,i.e., at least one dimension will exactly match the output dimension requested, and the other dimension will be equal to or smaller than the corresponding output dimension requested.
The entire image content and the aspect ratio are preserved. The output image dimensions are 200x200. So, the height is exactly what is requested, but the width is smaller than what was requested.
{% /linetab %}
{% /linetabs %}
{% callout style="info" %}
Note:
This mode is particularly useful if you have a container and you want to ensure that the image will never be larger than that container.
If the requested dimension is more than the original dimension of the image, then the original image is returned without cropping. To enlarge the images more than the original dimensions, check strategy. {% /callout %}
This strategy is similar to the strategy, except it also allows an image to be enlarged beyond its original dimensions.
The output image is less than or equal to the dimensions specified in the URL,i.e., at least one dimension will exactly match the output dimension requested, and the other dimension will be equal to or smaller than the corresponding output dimension requested.
The entire image content and the aspect ratio are preserved. The output image dimensions are 740x1000. So, the height is exactly what is requested, but the width is smaller than what was requested.
{% /linetab %}
{% /linetabs %}
Min-size cropping strategy - (c-at_least)
This strategy is similar to the strategy, with the only difference being that, unlike the max-size strategy, the image is equal to or larger than the requested dimensions.
One of the dimensions will be exactly the same as what is requested, while the other dimension will be equal to or larger than what is requested.
The entire image content and aspect ratio are preserved. The output image dimensions are 300x300. So, the width is exactly the same as what was requested, but the height is larger than what was requested.
{% /linetab %}
{% /linetabs %}
{% callout style="info" %}
Note: This is useful for cases where you want to have an image that is always at least as large as the container.
{% /callout %}
Maintain ratio crop strategy - (c-maintain_ratio)
This is the default crop strategy. If nothing is specified in the URL, this strategy gets applied automatically.
In this strategy, the output image's dimension (height and width) is the same as requested, and the aspect ratio is preserved. This is accomplished by resizing the image to the requested dimension and in the process cropping parts from the original image.
{% callout style="info" %}
Note: By default, ImageKit.io extracts the image from the center, but you can change this using the parameter.
{% /callout %}
{% linetab title="c-maintain_ratio(Center crop)" %}
or
In the above image, the top and the bottom of the image got cropped out. But the aspect ratio has been preserved from the original to the output image.
{% /linetab %}
{% linetab title="c-maintain_ratio with fo-custom" %}
Original Image URL -
Using c-maintain_ratio with fo-custom -
{% /linetab %}
{% /linetabs %}
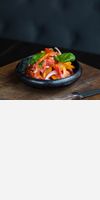
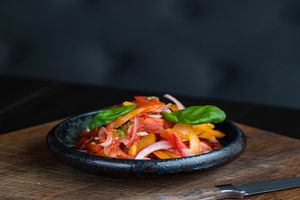
Examples - Object-aware cropping (maintain-ratio)
We can also provide an object-specific focus to crop the image, ensuring that the object is centered while cropping out the less important parts of the image. This focus mode can be combined with the zoom transformation to control how much to zoom in/out while cropping. Read more about it .
In the above image, rather than cropping equally from both the left and right, only the left portion was cropped to ensure the object in focus is centered. Learn more about object-aware cropping .
{% /linetab %}
{% /linetabs %}
You may also provide a list of objects to the fo parameter if you are unsure about the exact object type. Read more about it .
Extract crop strategy - (cm-extract)
In this strategy, the output image's dimension (height and width) is exactly the same as requested, and the aspect ratio is preserved.
Instead of trying to resize the image as we did in the maintain ratio strategy, we extract out a region of the requested dimension from the original image.
{% callout style="info" %}
Note: By default, ImageKit.io extracts the image from the center, but you can change this using the parameter.
{% /callout %}
{% linetab title="cm-extract(Default center extract)" %}
The size of the image content has not changed at all from the original image, which means that no resizing has taken place. Instead, we have been able to extract out a 200x200 area from the original image. This is the regular center extract.
{% /linetab %}
{% linetab title="Relative focus" %}
In the relative method, you can use the focus (fo) parameter to specify that the extract should be done from, let's say, the bottom-right of the original image.
Valid relative values for fo parameters are - center, top, left, bottom, right, top_left, top_right, bottom_left and bottom_right.
Example URL -
This is the extract done with focus on the bottom right of the original image.
{% /linetab %}
{% /linetabs %}
Example - Focus using cropped image coordinates
{% linetabs %}
{% linetab title="Focus using X, Y Coordinates" %}
In the coordinate method of focus, we use the parameters x and y to determine the position of the top-left corner from where the extract would begin.
You can also provide arithmetic expressions such as iw_mul_0.4 or ih_mul_0.4 as values for these parameters. This will first calculate the value of the expression and then use those values for extraction. Learn more about arithmetic expressions .
Example URL -
The extract is made starting from (100,300) point on the original image.
{% /linetab %}
{% linetab title="Focus using center coordinates xc, yc" %}
In the center coordinate method of focus, we use the parameters xc and yc to determine the position of the center of the image that would be extracted.
You can also provide arithmetic expressions such as iw_div_3 or ih_div_2 as values for these parameters. This will first calculate the value of the expression and then use those values for extraction. Learn more about arithmetic expressions .
Example URL -
The extract is made centered on (300, 500) points on the original image.
This crop mode is really useful when you want to crop the image on the basis of the focal point of your resultant image.
An important point to note about the center coordinate crop mode is that if either the height or width dimension of the cropped image as per the given center coordinates goes beyond the bounds of the original image, the crop will fail.
So, we suggest ensuring that you are using the correct height and width dimensions when cropping images using center coordinates.
{% /linetab %}
{% /linetabs %}
Examples - Object-aware cropping (cm-extract)
Instead of specifying the x, y, xc or yc coordinates to focus on a particular area, you can also set the fo value to an object from the , which will intelligently detect xc and yc values as the center of the provided object and extract the image with the given width and height. Learn more about object-aware cropping . This focus mode can be combined with the zoom transformation to control how much to zoom in/out while cropping. Read more about it .
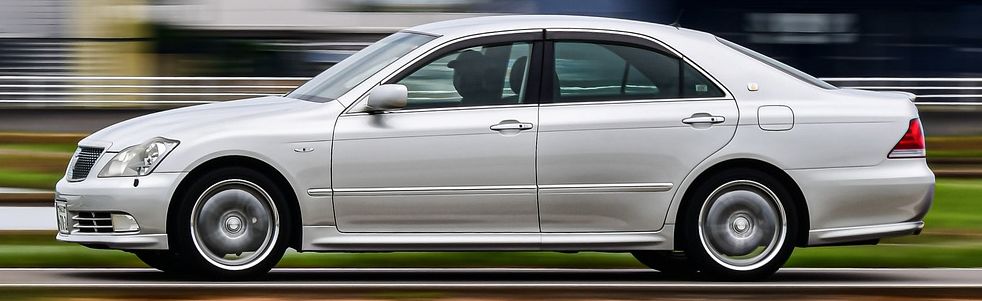
Here, we have intelligently detected the xcand yc values as the central coordinates of the car and then extracted out an area of 600x400 from that center.
{% /linetab %}
{% /linetabs %}
You may also provide a list of objects to the fo parameter if you are unsure about the exact object type. Read more about it .
Example - Focus using custom coordinates
Instead of specifying the x, y, xc or xy coordinates to focus on a particular area, you can also specify the focus area in an image while uploading the image or from the media library and then use fo-custom transformation in the image URL. ImageKit will then utilize the custom crop area specified with the image for all crop operations. This custom focus mode works for both the and the default strategy.
{% linetab title="Focus using custom coordinates" %}
A 500x100px thumbnail with cm-extract crop strategy and fo-custom.
{% /linetab %}
{% /linetabs %}
Unexpected behavior with auto rotation
ImageKit.io can be configured to auto-rotate images based on the Orientation value in the image metadata. This could result in unexpected behavior when using cm-extract. In that case, you will have to adjust the values of x and y to accommodate for the oriented image.
Pad extract crop strategy - (cm-pad_extract)
The pad extract crop strategy is an extension of the strategy. In the extract crop strategy, we were extracting out a smaller area from a larger image. Now, there can be a scenario where the original image is small and we want to extract out a larger area (which is practically not possible without padding). So, the pad extract mode adds a solid colored padding around the image to match the exact size requested.
This transformation is specified using the value cm-pad_extract transformation parameter in the URL.
The original image was 600x600, but this image is an 800x800 image.
{% /linetab %}
{% /linetabs %}
Focus - (fo)
This parameter can be used along with , , or to change the behavior of padding or cropping. Learn more from the different examples shown in respective sections.
This parameter can have the following values depending on where it is being used:
left, right, top, bottom can be to control the position of padding when used with pad resize. Learn from .
fo-custom can be used to define a specific focus area when used with and .
center, top, left, bottom, right, top_left, top_right, bottom_left and bottom_right can be used to define relative cropping during extract crop. Learn from .
Apart from the above, the fo parameter also has additional options that intelligently detect the most important part of an image to create thumbnails, i.e., auto and face. Let's see them in action:
Auto smart cropping - (fo-auto)
In this mode, ImageKit.io automatically determines the most important part of the image and preserves it in the output thumbnail. This is enabled by passing the fo-auto parameter in the URL transformation parameters.
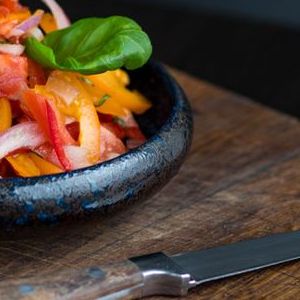
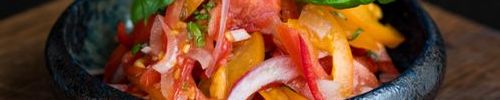
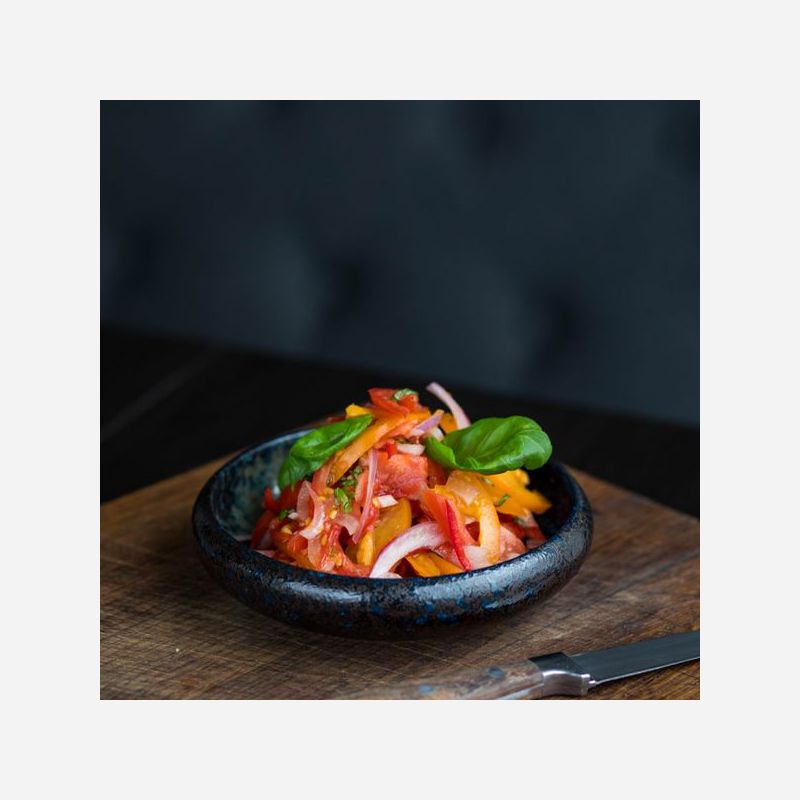
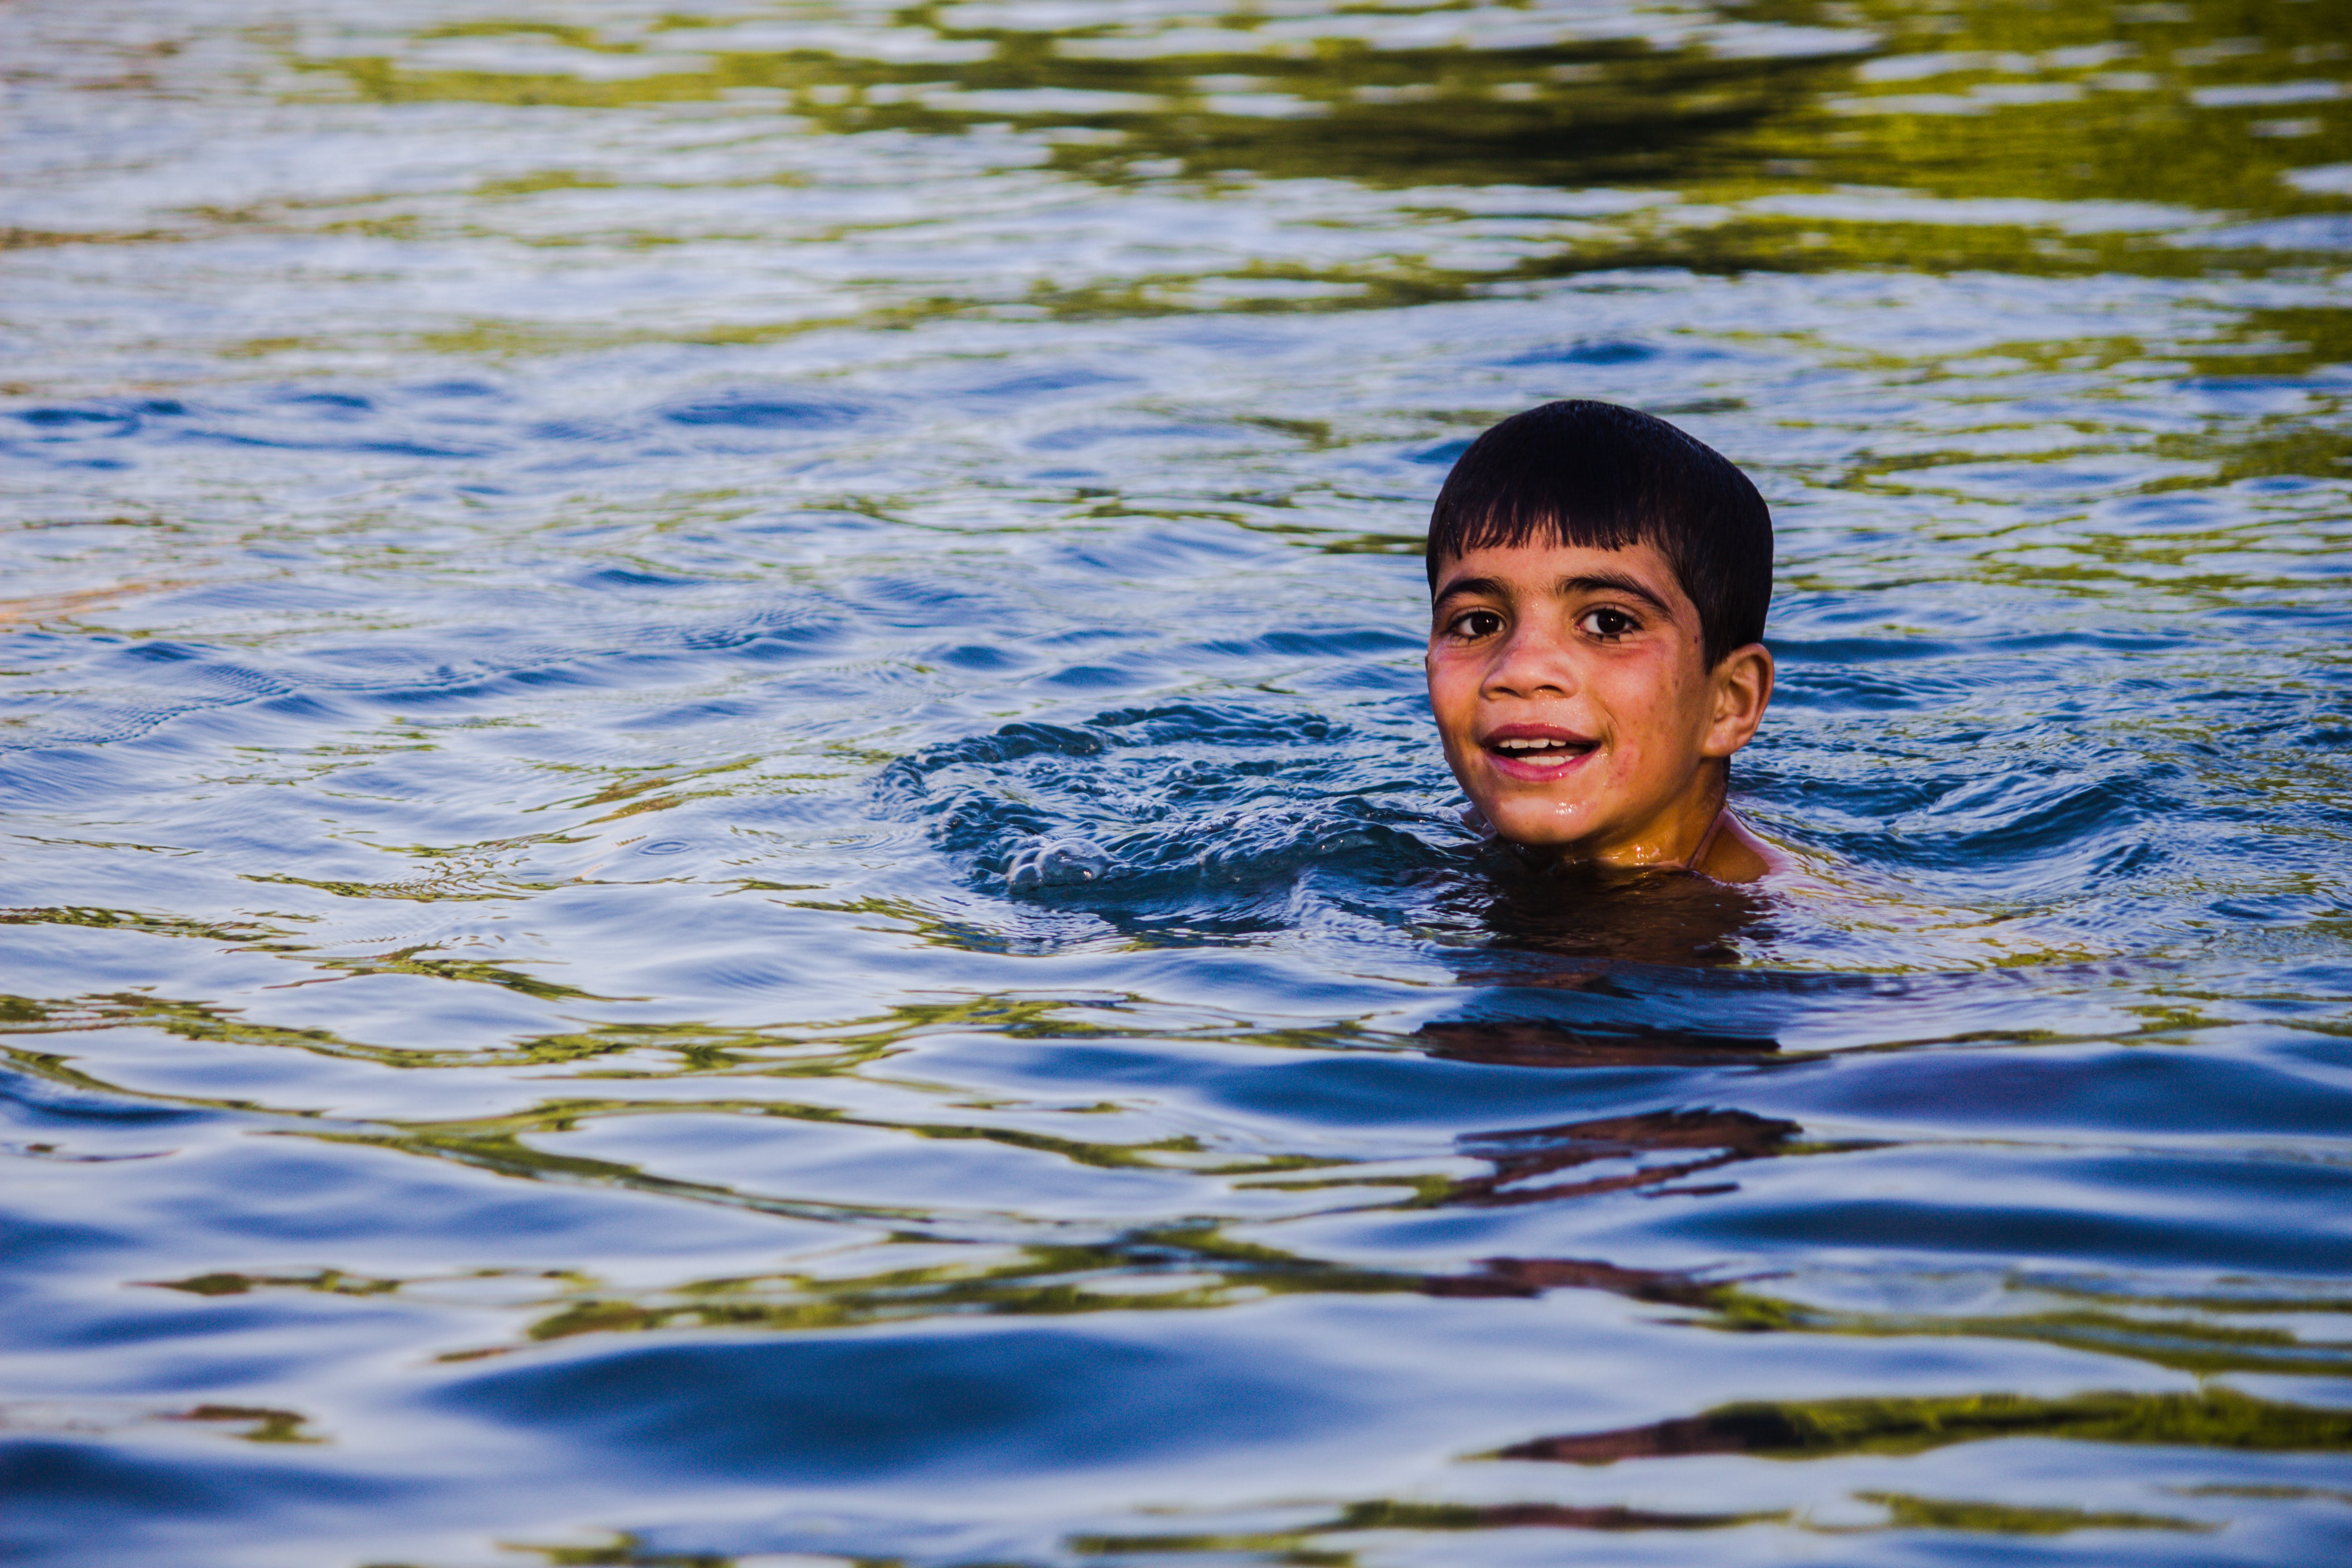
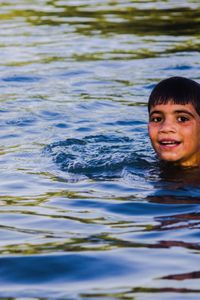
For example, in the image below, the child is the main subject, and he is slightly towards the right from the center of the image.
{% /linetab %}
{% linetab title="Regular cropping" %}
If we use regular resize and the default crop strategy, we get the following result, where the main subject is off the center. This is definitely not a great thumb image to have.
{% /linetab %}
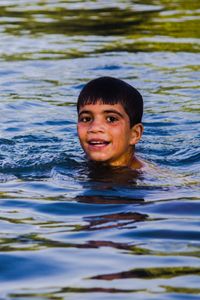
{% linetab title="Smart crop (fo-auto)" %}
With smart crop auto mode, this is what the final result looks like. The main subject is right in the center of the final thumbnail.
{% /linetab %}
{% /linetabs %}
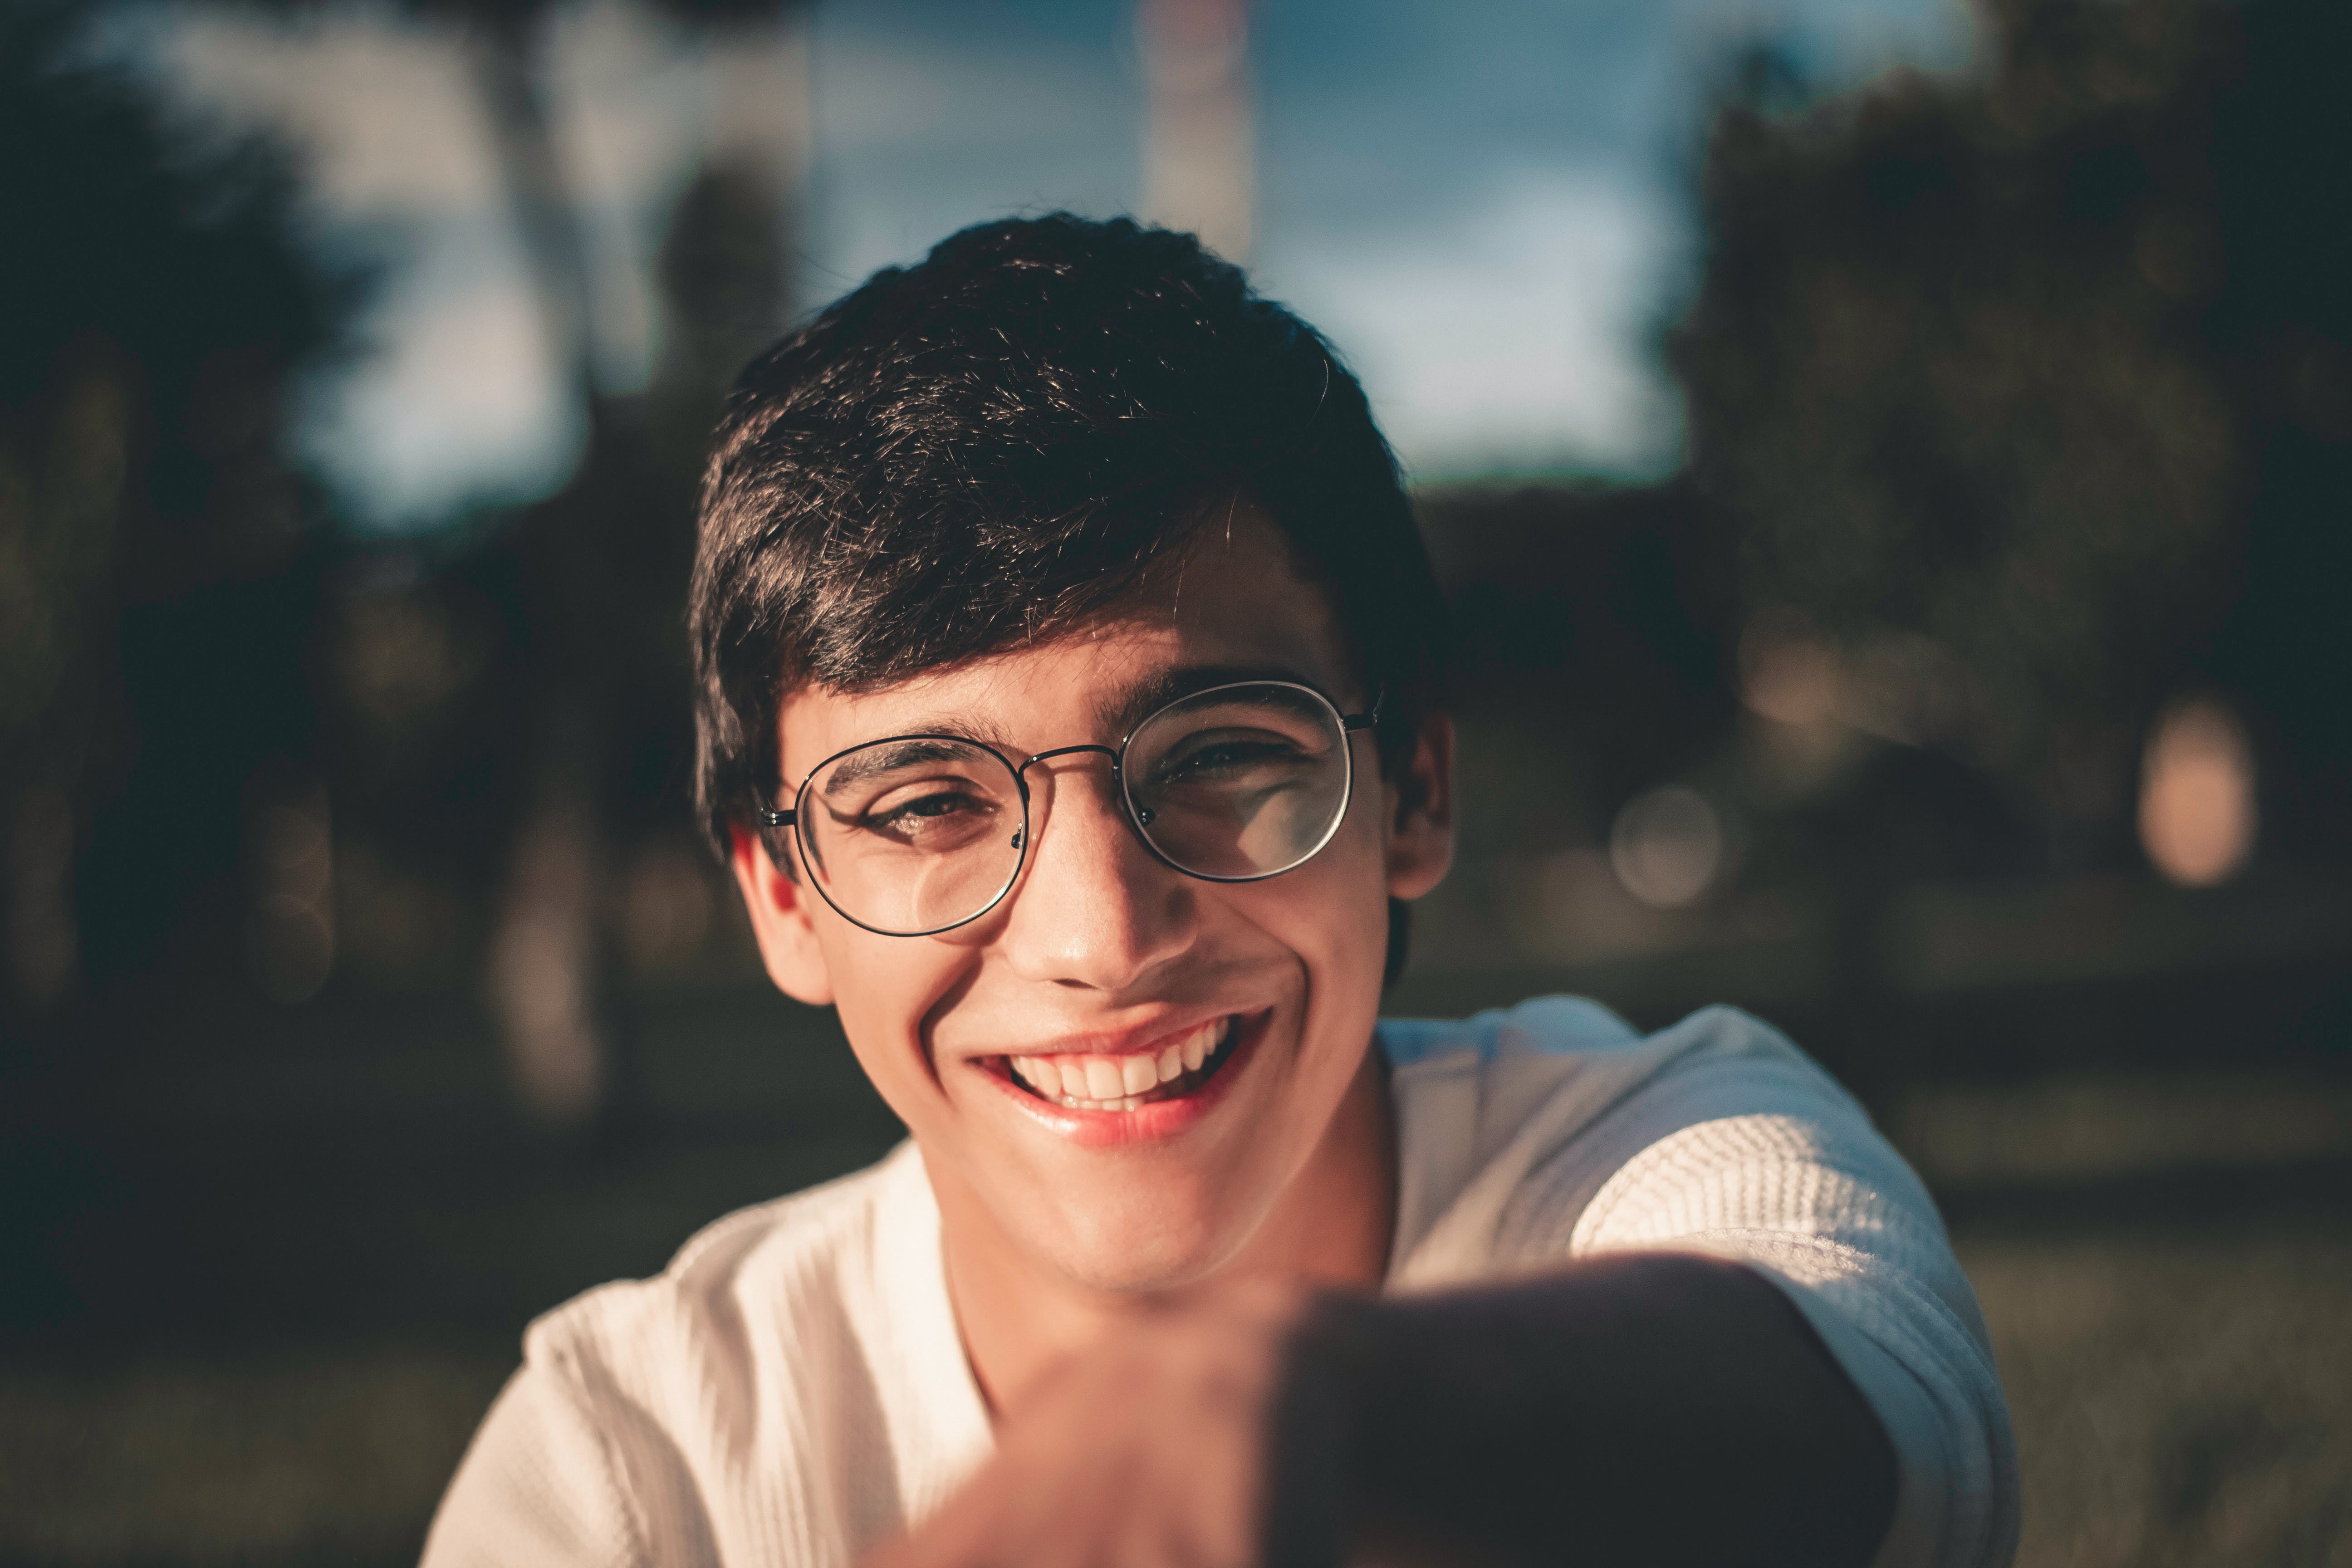
Face cropping - (fo-face)
In face crop, the crop works more like the extract crop strategy, but instead of focusing on the center of the image, it finds out the face (or multiple faces) in the image and focuses around that.
This gives you perfect thumbnails with just the subject's face that make up for good profile pictures.
This mode is enabled using the 'fo-face' parameter in the URL transformation parameters.
{% callout style="info" %}
Note: Smart crop may not give accurate results for some images. There is a trade-off between speed (needed for real-time transformations) and accuracy.
{% /callout %}
Object-aware cropping - (fo-object name)
To automatically provide high focus to a particular object while cropping, you can set the fo value to an object from the . This allows for intelligent cropping of the image based on the specific objects detected within it.
It can be used along with or to intelligently crop or extract parts of the image as needed. Learn more from the different examples shown in respective sections.
We can also choose not to provide dimensions and deliver an image that is tightly cropped to the object.
Tightly crop object
To deliver an image that is tightly cropped to the object, provide fo-<object name> without specifying height and width dimensions. This will return an image that contains only the given object.
We can also specify aspect ratio along with the fo-<object name> focus option without providing height and width. This keeps the object in focus but may include more of the image to fit the specified aspect ratio.
It can also accept a zoom parameter to include more background or reduce it, as explained .
You can also provide multiple objects from a of supported objects to the fo parameter. The image will be cropped according to the position of the first object found. It can be helpful when the exact object type is unknown, but you have a general idea of which object types it might belong to.
Here, we crop out the car as the first object truck is not present in the image.
{% /linetab %}
{% linetab title="Tightly Cropped image with aspect ratio" %}
URL -
We crop out the first detected object car from the image with a 2:1 aspect ratio.
{% /linetab %}
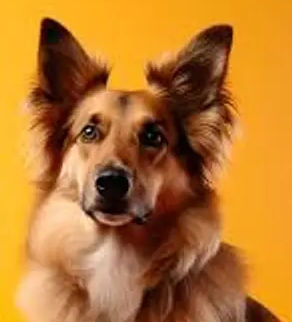
Since dog is the first object in the given list, the image is cropped based on the position of the dog.
{% /linetab %}
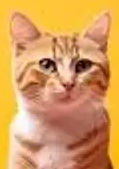
{% linetab title="Cropping cat" %}
URL -
Since cat is the first object in the given list, the image is cropped based on the position of the cat.
{% /linetab %}
{% /linetabs %}
Supported object list
We currently support all the objects included in the COCO classes. The object list is mentioned below:
COCO Classes
person
bicycle
car
motorcycle
airplane
bus
train
truck
boat
trafficLight
fireHydrant
stopSign
parkingMeter
bench
bird
cat
dog
horse
sheep
cow
elephant
bear
zebra
giraffe
backpack
umbrella
handbag
tie
suitcase
frisbee
skis
snowboard
sportsBall
kite
baseballBat
baseballGlove
skateboard
surfboard
tennisRacket
bottle
wineGlass
cup
fork
knife
spoon
bowl
banana
apple
sandwich
orange
broccoli
carrot
hotDog
pizza
donut
cake
chair
couch
pottedPlant
bed
diningTable
toilet
tv
laptop
mouse
remote
keyboard
cellPhone
microwave
oven
toaster
sink
refrigerator
book
clock
vase
scissors
teddyBear
hairDrier
toothbrush
Zoom - (z)
This parameter accepts a number that determines how much to zoom in or out of the cropped area. It must be used along with or . A value less than 1.0 zooms out to include more background surrounding the object, whereas a value larger than 1.0 zooms in to exclude more background surrounding the object.
Possible Values - 0 < z < 1 (zoom out); z > 1 (zoom in); z-1
Since no value of zoom is mentioned hence by default zoom=1.
{% /linetab %}
{% linetab title="Zoom=2.0" %}
For z=2.0, a thumbnail is generated zoomed in on the face with a zoom amount of 200%, excluding more background surrounding the face.
{% /linetab %}
{% linetab title="Zoom=0.5" %}
For z=0.5, a thumbnail is generated zoomed out to 50% before cropping, including more of the background surrounding the face.
{% /linetab %}
{% /linetabs %}
With fo-<object> and default crop mode (c-maintain_ratio)
When no zoom value is provided, the behavior defaults to simple , where only one dimension of the image is cropped. However, when zoom=1 is specified, it can crop the image on both dimensions to focus on the object as much as possible.
In the above image, rather than cropping equally from both the left and right, only the left portion was cropped to ensure the object in focus is centered. Learn more about object-aware cropping .
{% /linetab %}
{% linetab title="Zoom=1" %}
URL -
In the above image, the entire car has been preserved, and additional background has been added vertically to maintain the original aspect ratio of the image.
{% /linetab %}
{% linetab title="Zoom=0.6" %}
URL -
The car image has been zoomed out to include more of the background.
{% /linetab %}
{% linetab title="Zoom=1.4" %}
URL -
The car image has been zoomed in to exclude background and focus more on the car.
{% /linetab %}
Here, we have intelligently detected the xcand yc values as the central coordinates of the car and then extracted out an area of 600x400 from that center. Here, by default zoom=1.
{% /linetab %}
{% linetab title="Zoom=0.6" %}
URL -
The image has been zoomed out to include more of the background.
{% /linetab %}
{% linetab title="Zoom=1.4" %}
URL -
The image has been zoomed in to exclude the background and focus more on the object.
{% /linetab %}
{% /linetabs %}
The output is an image containing just the car. Here, by default zoom=1.
{% /linetab %}
{% linetab title="Zoom=0.6" %}
URL -
The output is a zoomed out image of the car.
{% /linetab %}
{% linetab title="Zoom=1.4" %}
URL -
The output is a zoomed in image of the car.
{% /linetab %}
{% /linetabs %}
{% linetabs %}
{% linetab title="With aspect ratio and default zoom" %}
URL -
The output is an image containing only the car, plus the additional height needed to maintain an aspect ratio of 2. Here, by default zoom=1.
{% /linetab %}
{% linetab title="Zoom=0.6"%}
URL -
The output is a zoomed out image of the car with ar-2_1.
{% /linetab %}
{% linetab title="Zoom=1.4" %}
URL -
The output is a zoomed in image of the car with ar-2_1.
{% /linetab %}
{% /linetabs %}
DPR - (dpr)
Used to specify the device pixel ratio that is used to calculate the dimensions of the output image. Extremely helpful when creating image transformations for devices with a high device pixel ratio (DPR > 1), like the iPhone or high-end Android devices.
The dpr parameter can only be used when either the height or width of the desired output image is specified.
If the output image's height or width after considering the specified DPR is less than 1px or greater than 5000px, the value of DPR is not considered and the height or width used in the URL is used.
Possible values - 0.1 to 5.
Alternatively, you can specify the auto value for this parameter (dpr-auto). Doing so will instruct ImageKit to read the dpr value from the request header. Learn more about client hints .